Outside the Blockhouse, Germans and Australians faced one another with intent to take life. Inside, they worked shoulder to shoulder to save it.
I had spent an enjoyable, but ultimately disappointing, couple of days searching the area west of El Alamein for the Blockhouse. I was still keen to find this surviving landmark from the final battle at El Alamein, but I was running out of ideas.
The following day, Germans tanks and troops counterattacked, and a fierce battle raged around the Blockhouse. Holding a small, approximately one square kilometre area that included the Blockhouse, the Australian defenders were assailed by German tanks and infantry.
I decided I would try to contact the Italian author of the post I had found. I didn’t hold out much hope, as the link loaded as a PDF and looked pretty dated. I managed to find the author after some searching, and sent off a request for help. I then wrote to the tour company that had advertised visits to the site. I felt a bit cheeky; they were running a business after all, and might be reluctant to give up the location.
The following day I drove to Siwa to spend some time exploring the oasis. I would be staying a night at El Alamein on my return trip to Alexandria, so thought if I did receive a reply it would still give me a chance to visit the Blockhouse. That evening, I found a message from Gordon Wilkinson from Wilderness Ventures Egypt, which included clear directions to find the site, and also a map. It appeared that if I had turned west along the railway line, not east, from the town I assumed was Tel el Eissa I would have found the Blockhouse! I had been so close! From his email, it was clear that Gordon was also interested in, and very knowledgeable about, the area’s history, and was only too willing to help out a like-minded traveler. Relieved, it seemed like I was going to be able to visit the Blockhouse after all.
The Australians, having captured a functioning field hospital, set about adapting the position for their own use. Captain Bill Campbell took command of the facility, and all hands were put to task. The German medical staff were not permitted to leave with the other prisoners, but were required to stay at The Blockhouse. Campbell is quoted as saying he considered the German doctors ‘quite cooperative and efficient’.2
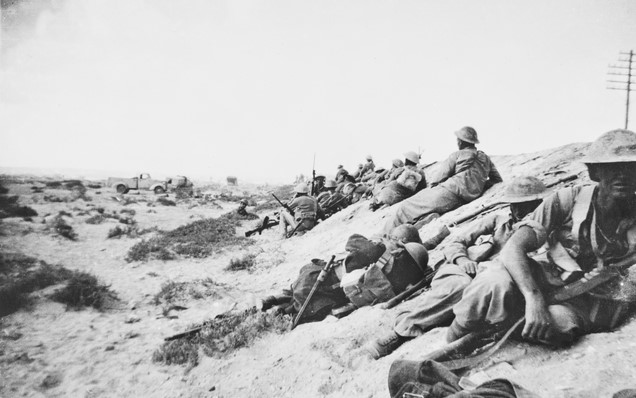
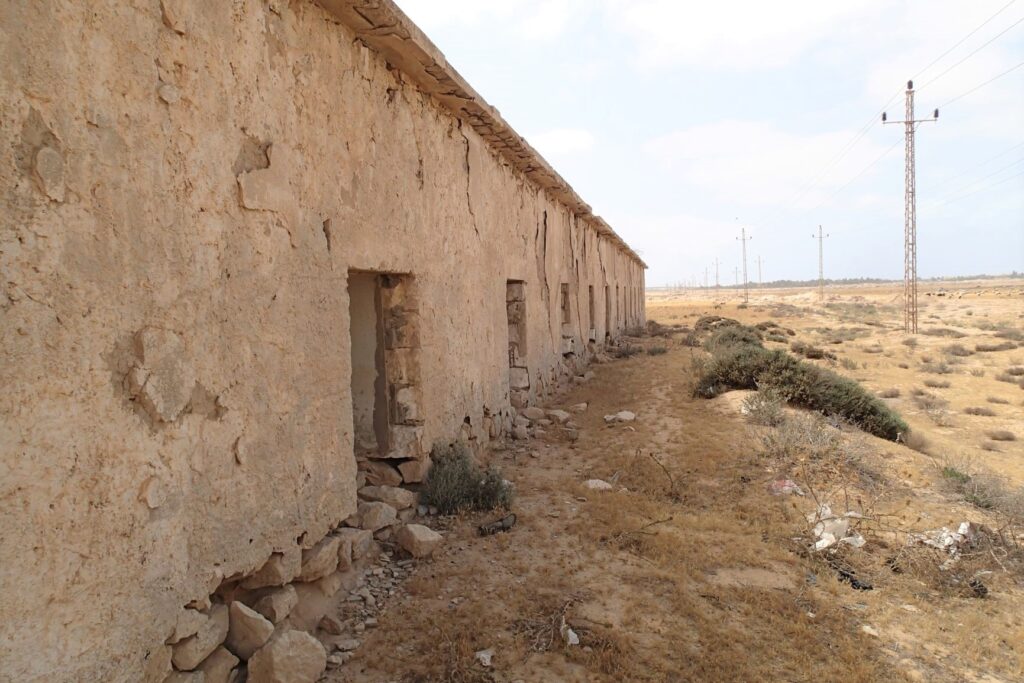
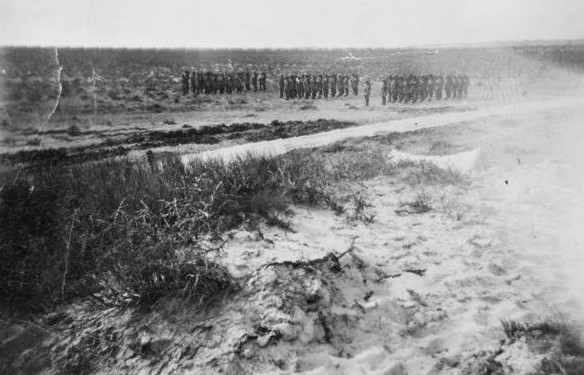
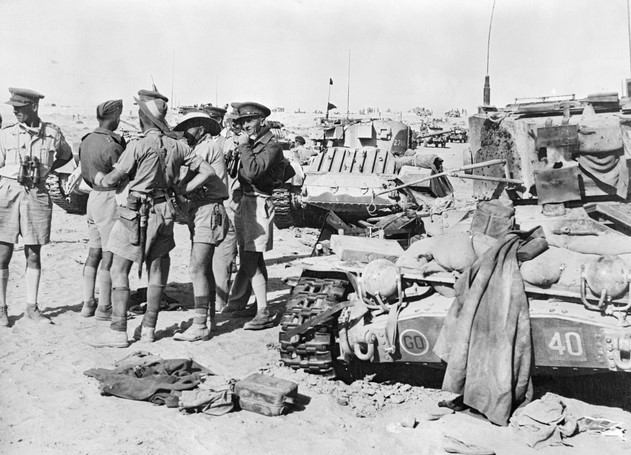
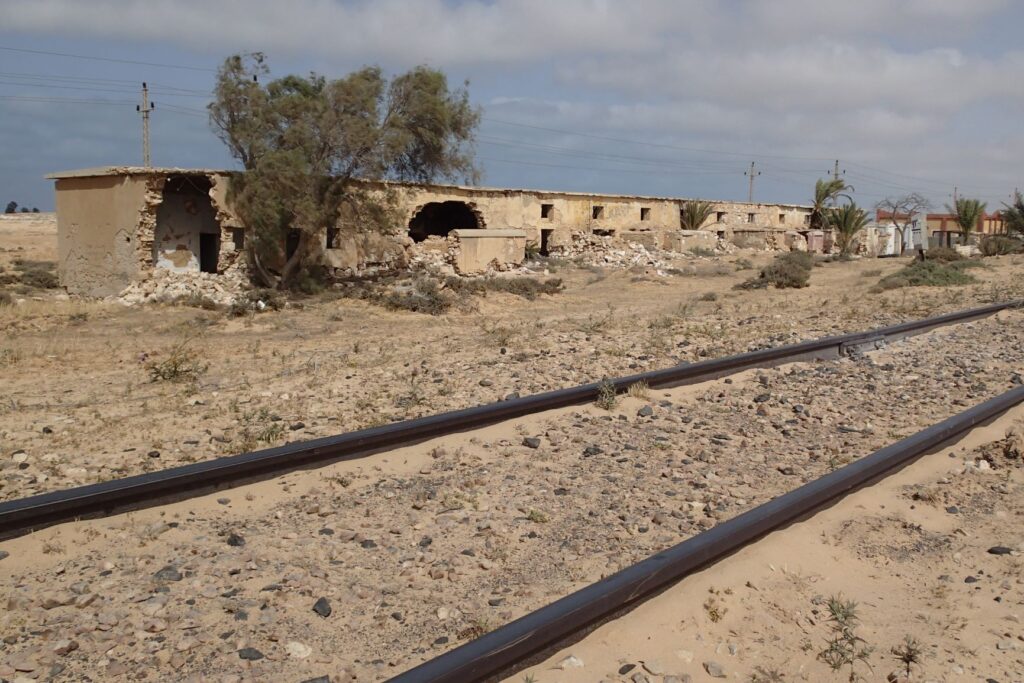
After the five hour drive from Siwa, I followed Gordon’s directions, turning south to the railway line, then west alongside the tracks. Sure enough I soon came across a long, low, concrete building, hidden from the east by a small change in topography. I parked the car, and climbed the small bank that held the railway line, wondering how close I was to where the photograph of the 2/3rd Australian Pioneer Battalion (shown above) had been taken. Surveying the building, I wasn’t entirely sure at first that I had the right place.
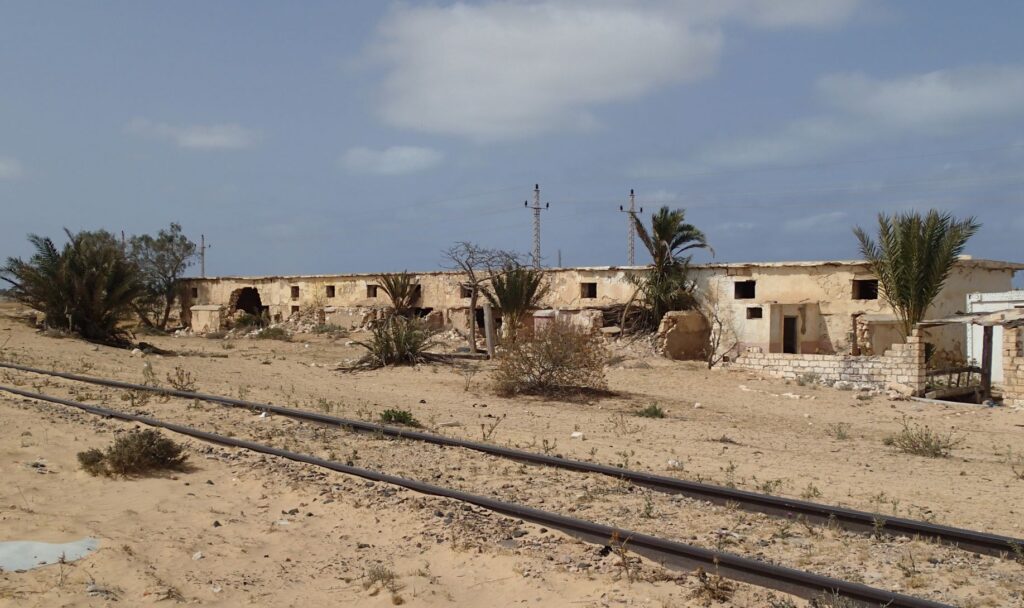
The photos I had were not that clear, and it appeared that the palms didn’t quite align. Two old telegraph poles, which had been specifically mentioned on one site, were not there. Walking around the far side of the building, I searched for the angle that one of the better photos showed. I found it, and matched small details I could make out in the photo with the wall of the building in front of me. It was the Blockhouse for sure.
Although the German medical team worked mainly on the German casualties, and the Australians on the Allies, the steady stream of wounded arriving at the Blockhouse were no longer strictly Axis or Allied, friend or foe, us or them. Germans and Australians worked together to save the lives they could, regardless of their uniform, and to comfort and relieve the suffering of those they could not.
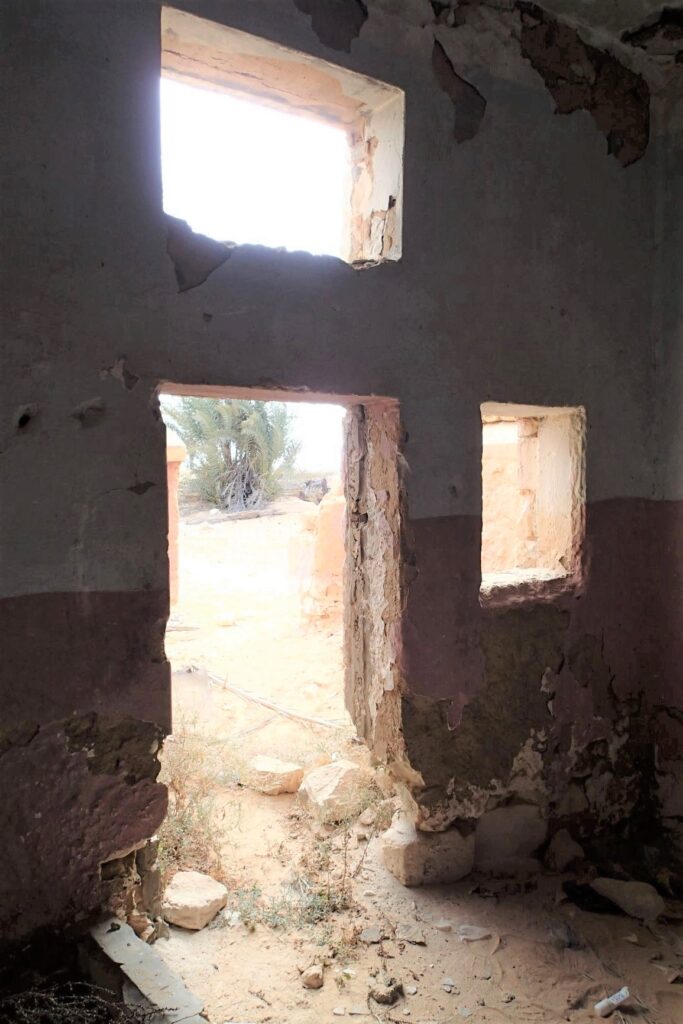
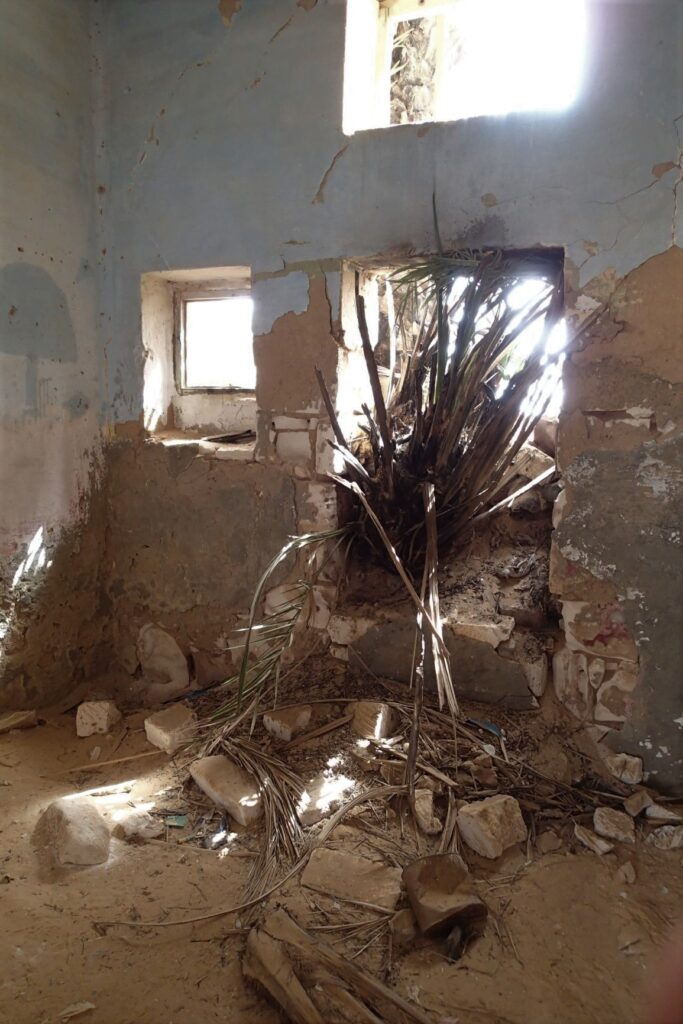
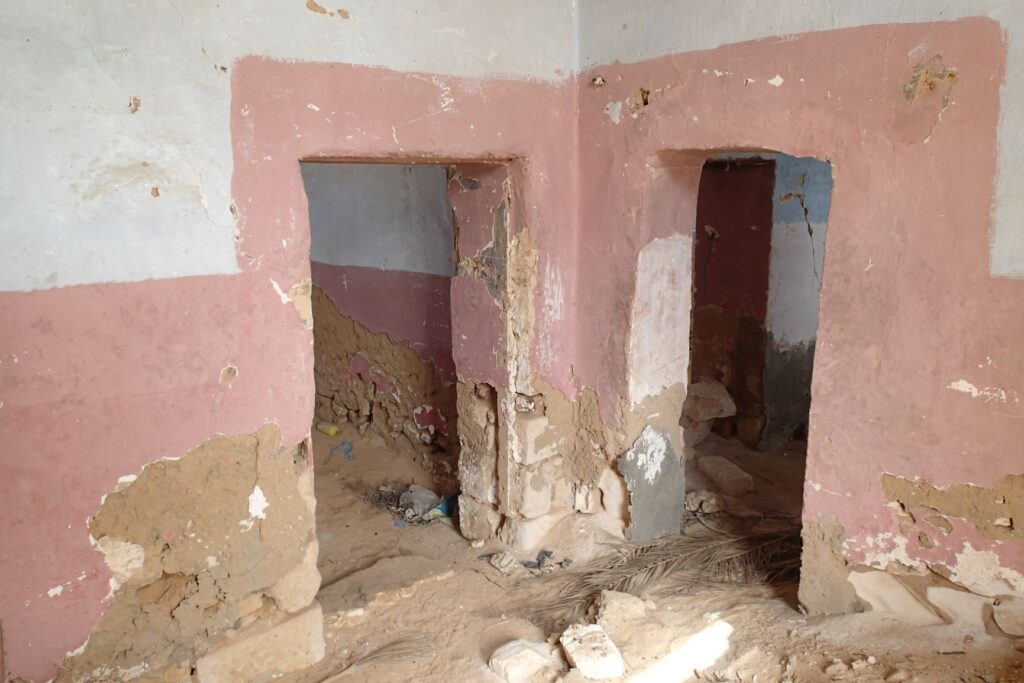
I breathed a big sigh of relief. It would have been really disappointing to have to leave El Alamein without finding the Blockhouse. Stepping out of the bright sunlight, I entered one of the doorways into the dim cool of the building. The floor was covered with windblown sand, and rubbish (sadly ubiquitous in Egypt) had gathered in the corners. The room had been repainted since the 40s, and graffiti added to the walls.
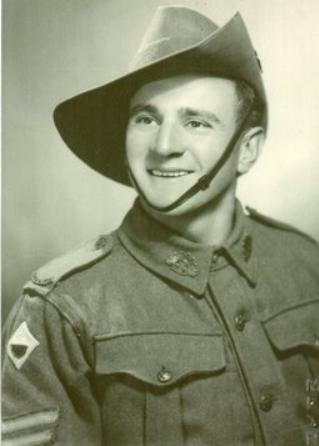
When Private Jack Ralla arrived at the Blockhouse, his leg wounds were treated by one of the German doctors. Similarly, it was the skill of the attending German surgeon that saved one of Corporal Gerry O’Connell’s seriously wounded arms, when it was feared both would require amputation.1 Rommel permitted the evacuation of the wounded from the Blockhouse; similarly the Australians had respected the sanctity of the hospital when it was in German hands.
Private Jack Ralla from Adelaide, South Australia
I wandered from room to room, pleased there was no-one around so I could take my time. I looked out the window and saw a mob of sheep peacefully grazing wheat stubble, where nearly 80 years ago the battle for El Alamein had raged. Apart from the sound of the wind, and the murmurs of the sheep, the place was quiet, and I tried to imagine what it must have been like during the peak of the fighting. The thoughts of crashing shells, the cries of the wounded, and a floor wet with blood made me shiver. Yet amidst such man-made horror, humanity had prevailed. Outside the Blockhouse, Germans and Australians faced one another with intent to take life. Inside, they worked shoulder to shoulder to save it.
The Australian 24th Brigade entered the battle surrounding the Blockhouse on the night of October 31, and the following day suffered over 100 casualties.
After exploring the Blockhouse, I walked back across the railway line to the car. Turning, I took a last look at the unremarkable concrete building, crumbling in the sand, where something altogether remarkable had happened all those years ago.
For more on the battle of El Alamein visit the Australian War Memorial here
1 Johnston, Mark 1999 The Blockhouse, El Alamein Wartime : official magazine of the Australian War Memorial, 8
If you enjoyed this post, you may also like Searching for the Blockhouse Part I, The S.S. Thistlegorm
Do you have a particular interest in World War I, II and the Cold War? Check out my other blog Ghosts of War. If you enjoy military history, and want to know what it’s like to visit both significant and lesser-known wartime locations today, there’s something there for you.
Leave a Reply